Turning this abused body, into this playable Telecaster Deluxe:

The story starts here.
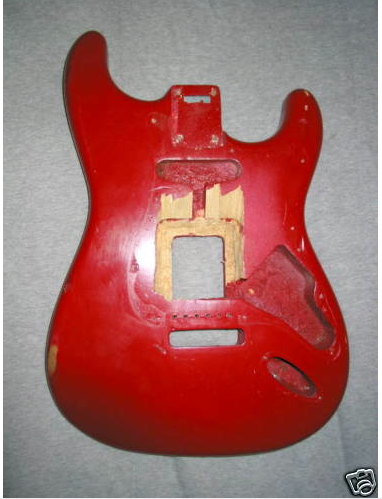
Here is a 1970's Fender Telecaster Deluxe that I bought one eBay. It has been used and abused. Actually it as been more then that, It's been routed, both professionally and with a screwdriver.... striped and painted (poorly). And filled with pennies and glue. The bridge was routed for Stratocaster bridge tremolo. And room for extra pickups, room for vol & tone, and for extra switches.
Well, I bought as a challenge to see if I could repair it. And also because wanted to assemble a Tele Deluxe with original pickups and such, but give it the look that CBS never did. Which is.. Olympic white and rosewood neck.
And since this guitar as been so abused, I wouldn’t feel bad not restoring it to all original color and neck.
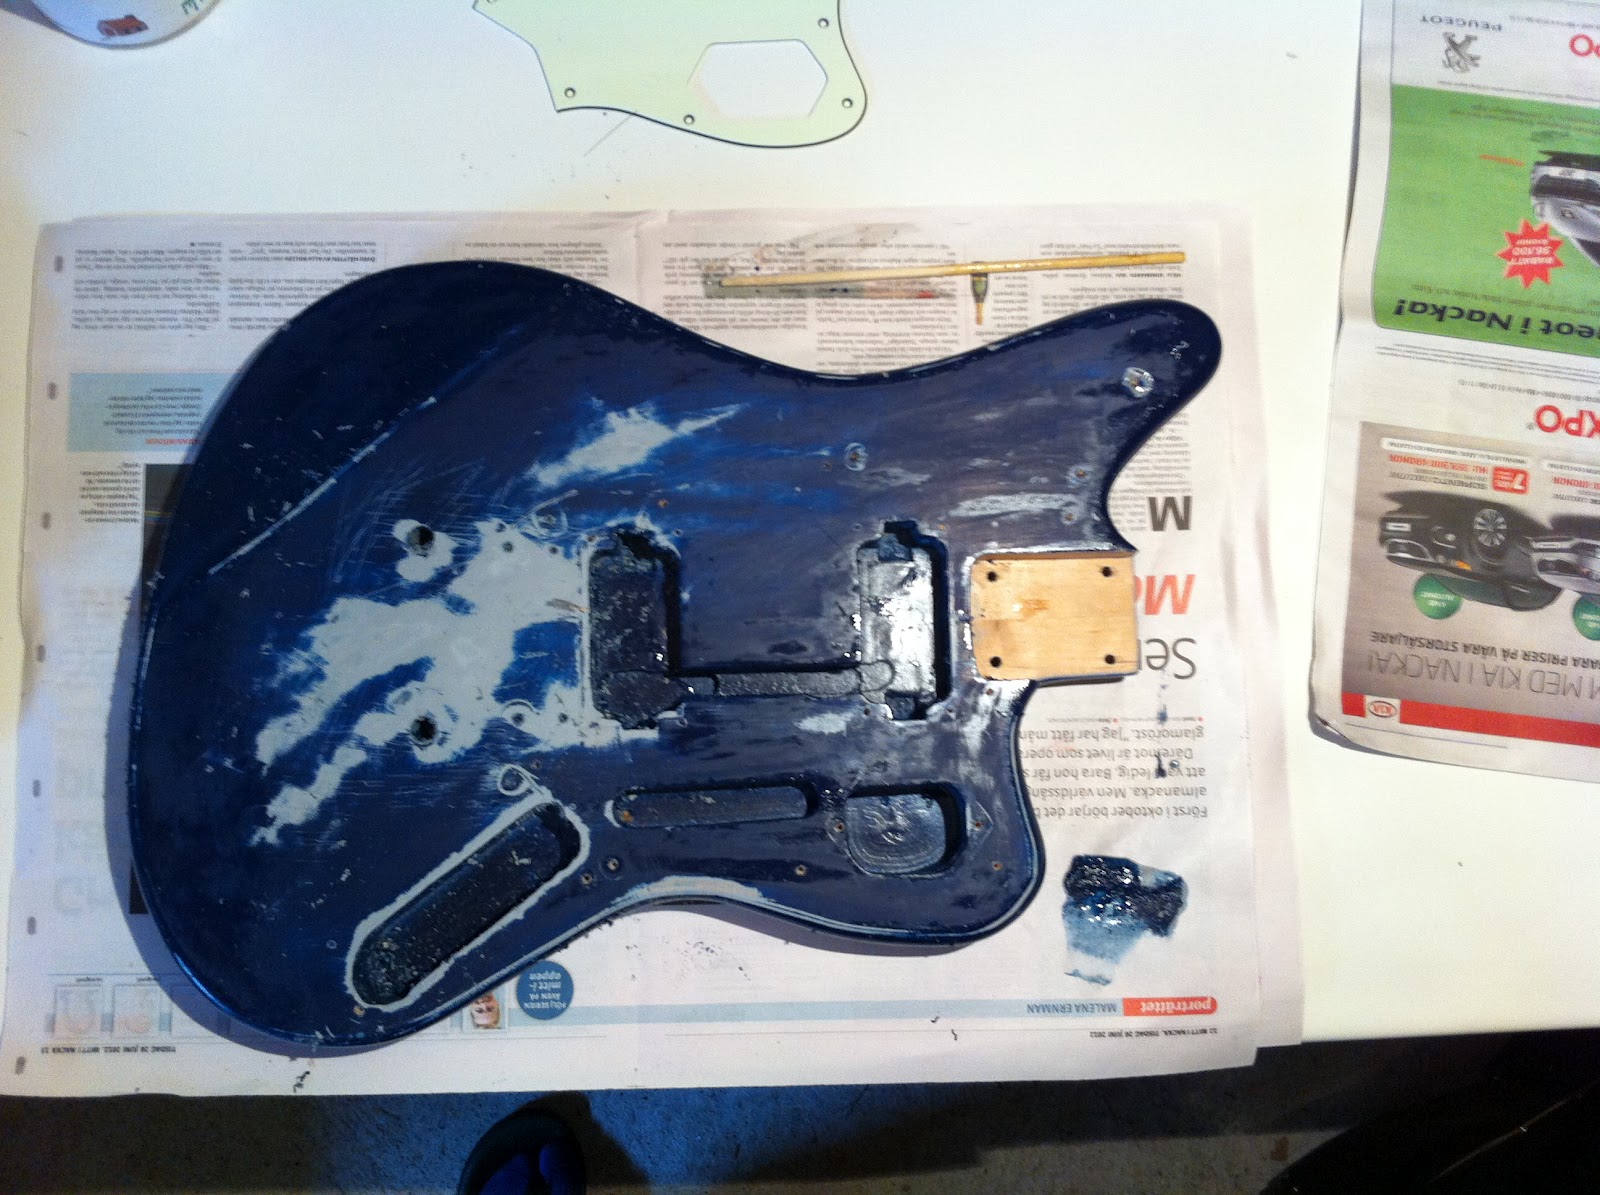
This is what it looked like


First off I need to remove the paint. I wanted to try an environmentally friendly paint stripper first. My guess is that the paint on it, is not original 1970's , and whoever did this mad job, striped the original paint (and clear coat) some time ago.
And I guess I was right, cause the paint came off like nothing to it.


I continued on the front, and on the sides of the guitar body.
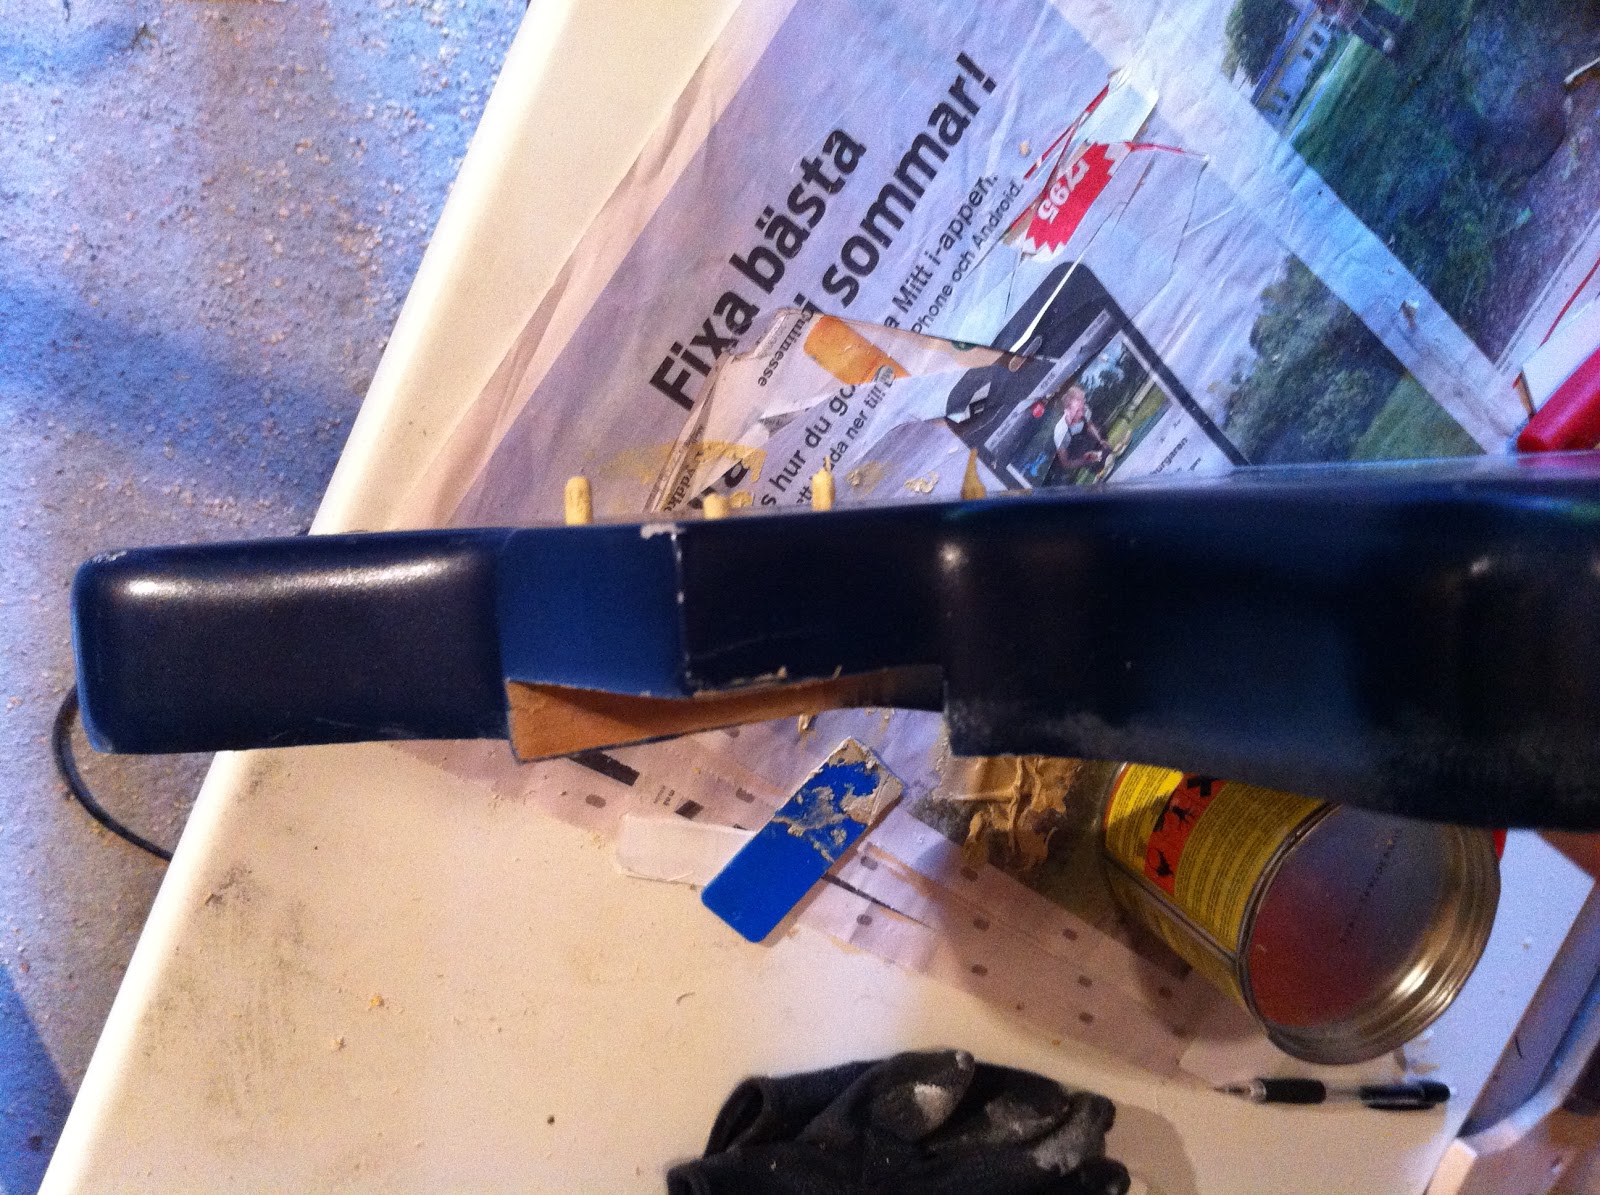
The sides of the guitar seemed to have the most of the original lacer left. They required several layers of paint remover. This was also when I discovered my first surprise......
Not only was the body filled with pennies, But they had drilled wholes throw the side of the entire body, and filed them with pennies and glue as well......


Next came the task of getting all the glue and pennies out. I simply took on a pair of protective glasses and start hacking away using a chisel. It took some time, cause it was like playing dominos. I had to take ‘em off one by one....
You can see that most of the top part is cleared. And I got the lower part left.
At this point I also decided to leave all the pennies that were glued in diagonally on the side of the body as they were.
Then I worked on getting the sides even using the plugs already there, rather then to create new ones.

Block sanding and more block sanding. 100grit and 125 grit paper
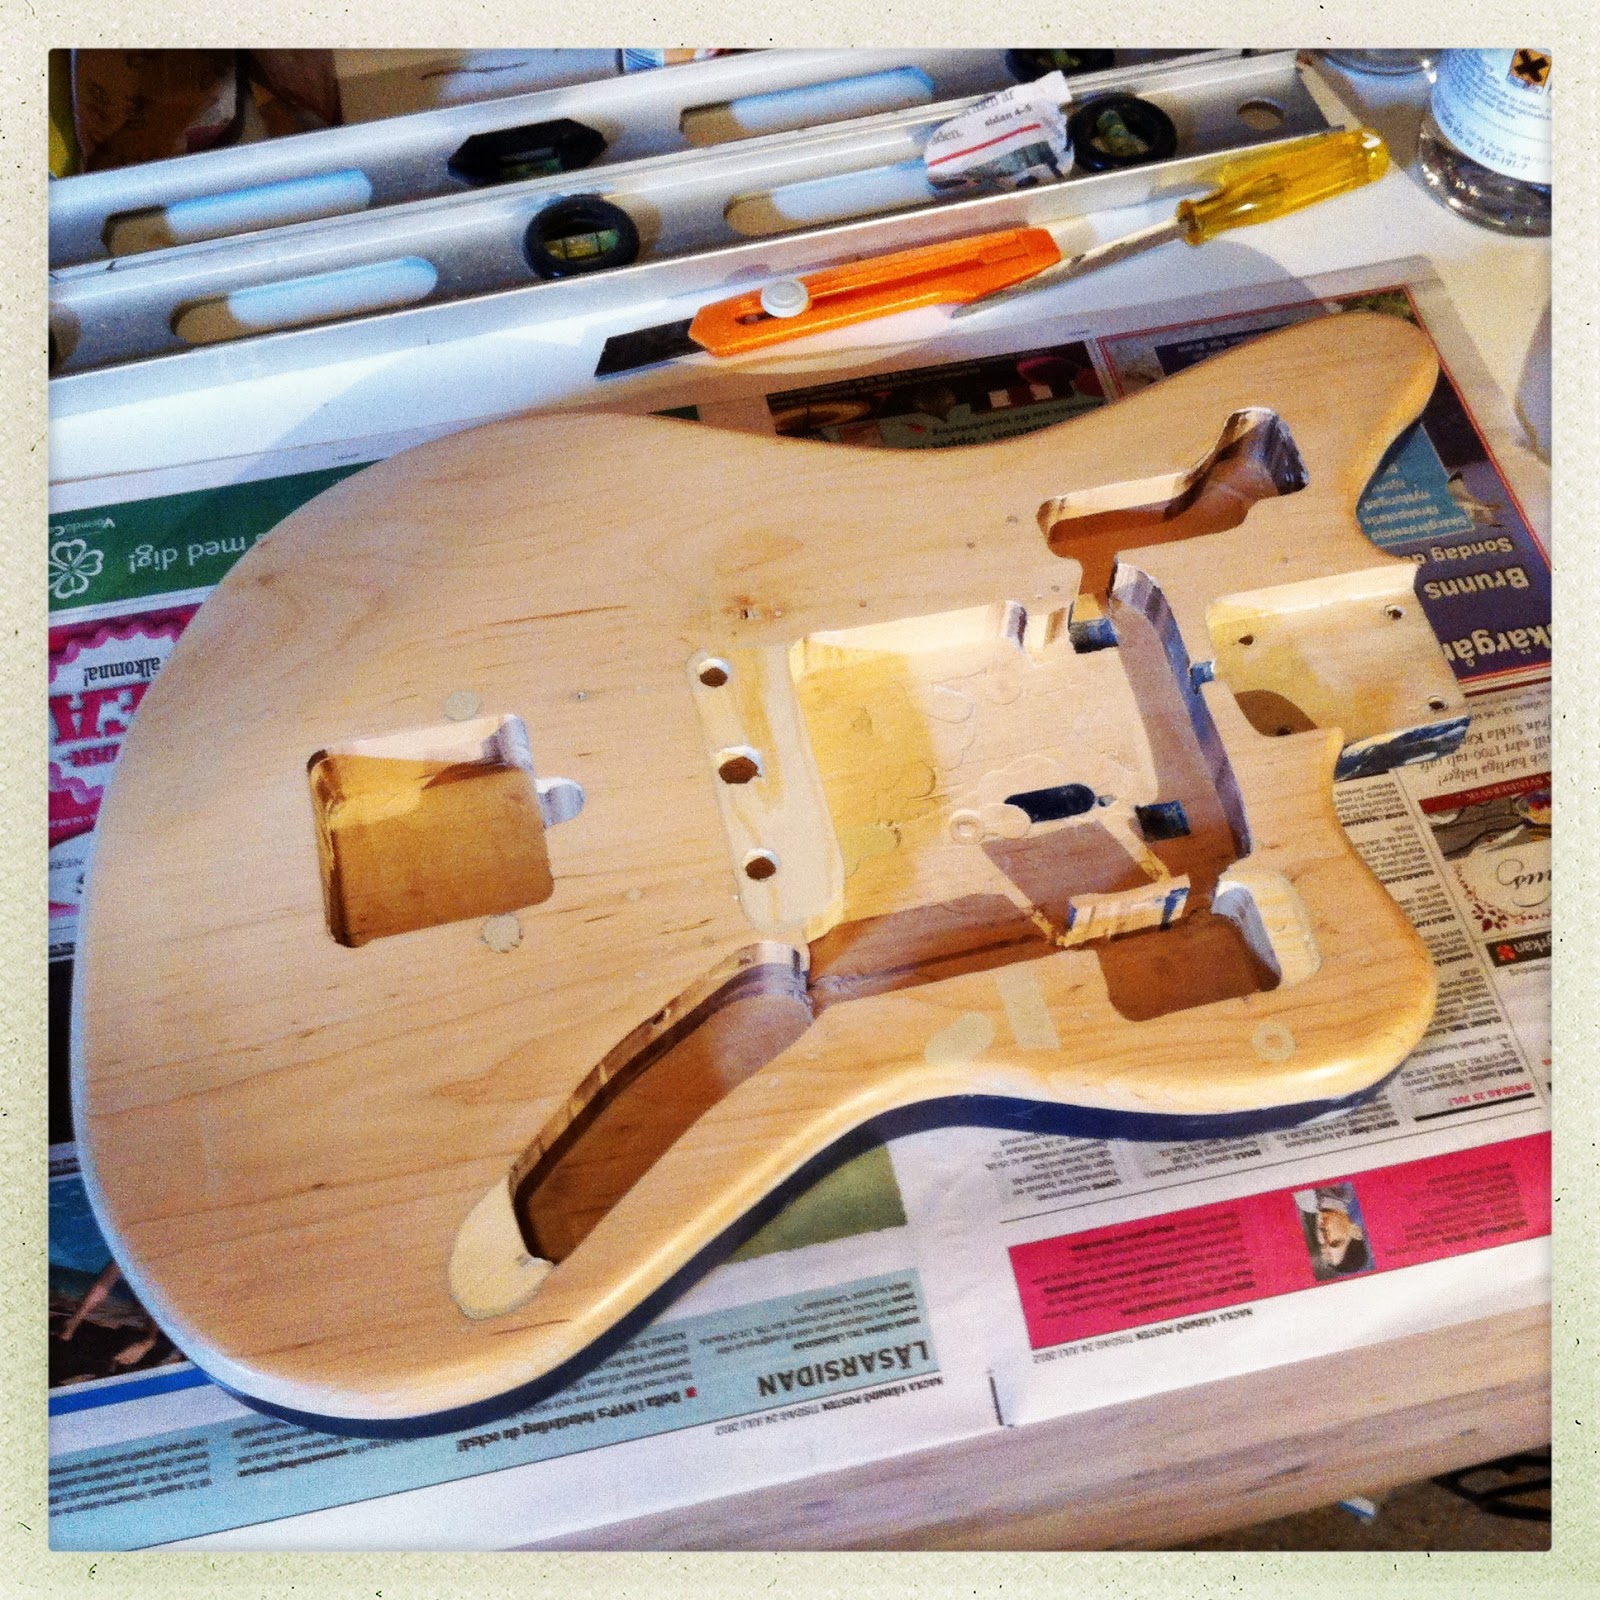
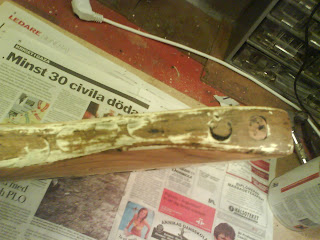
It was tricky getting all the color out of the routed bridge pocket. That part was not only cover with paint. it was also cover with some plastic filler.

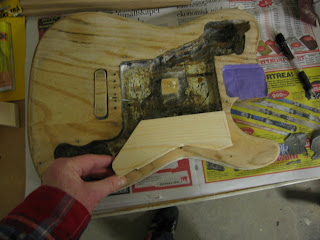
Next step was shaping the wood, so it would fit tight in the pocket. I used douglas fir for all the wood work on this guitar.
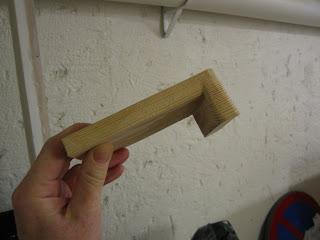
Getting this piece to fit sure wasn't easy.


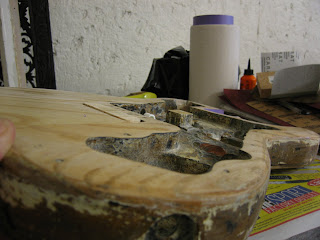

More body work

And more wood fitting.

Glued, and some wood filler in the gaps and then sanded

Matching were the other pieces should go, and working out the correct size.

Glued, and some wood filler in the gaps and then sanded

and some wood filler in the gaps on the back and then sanded

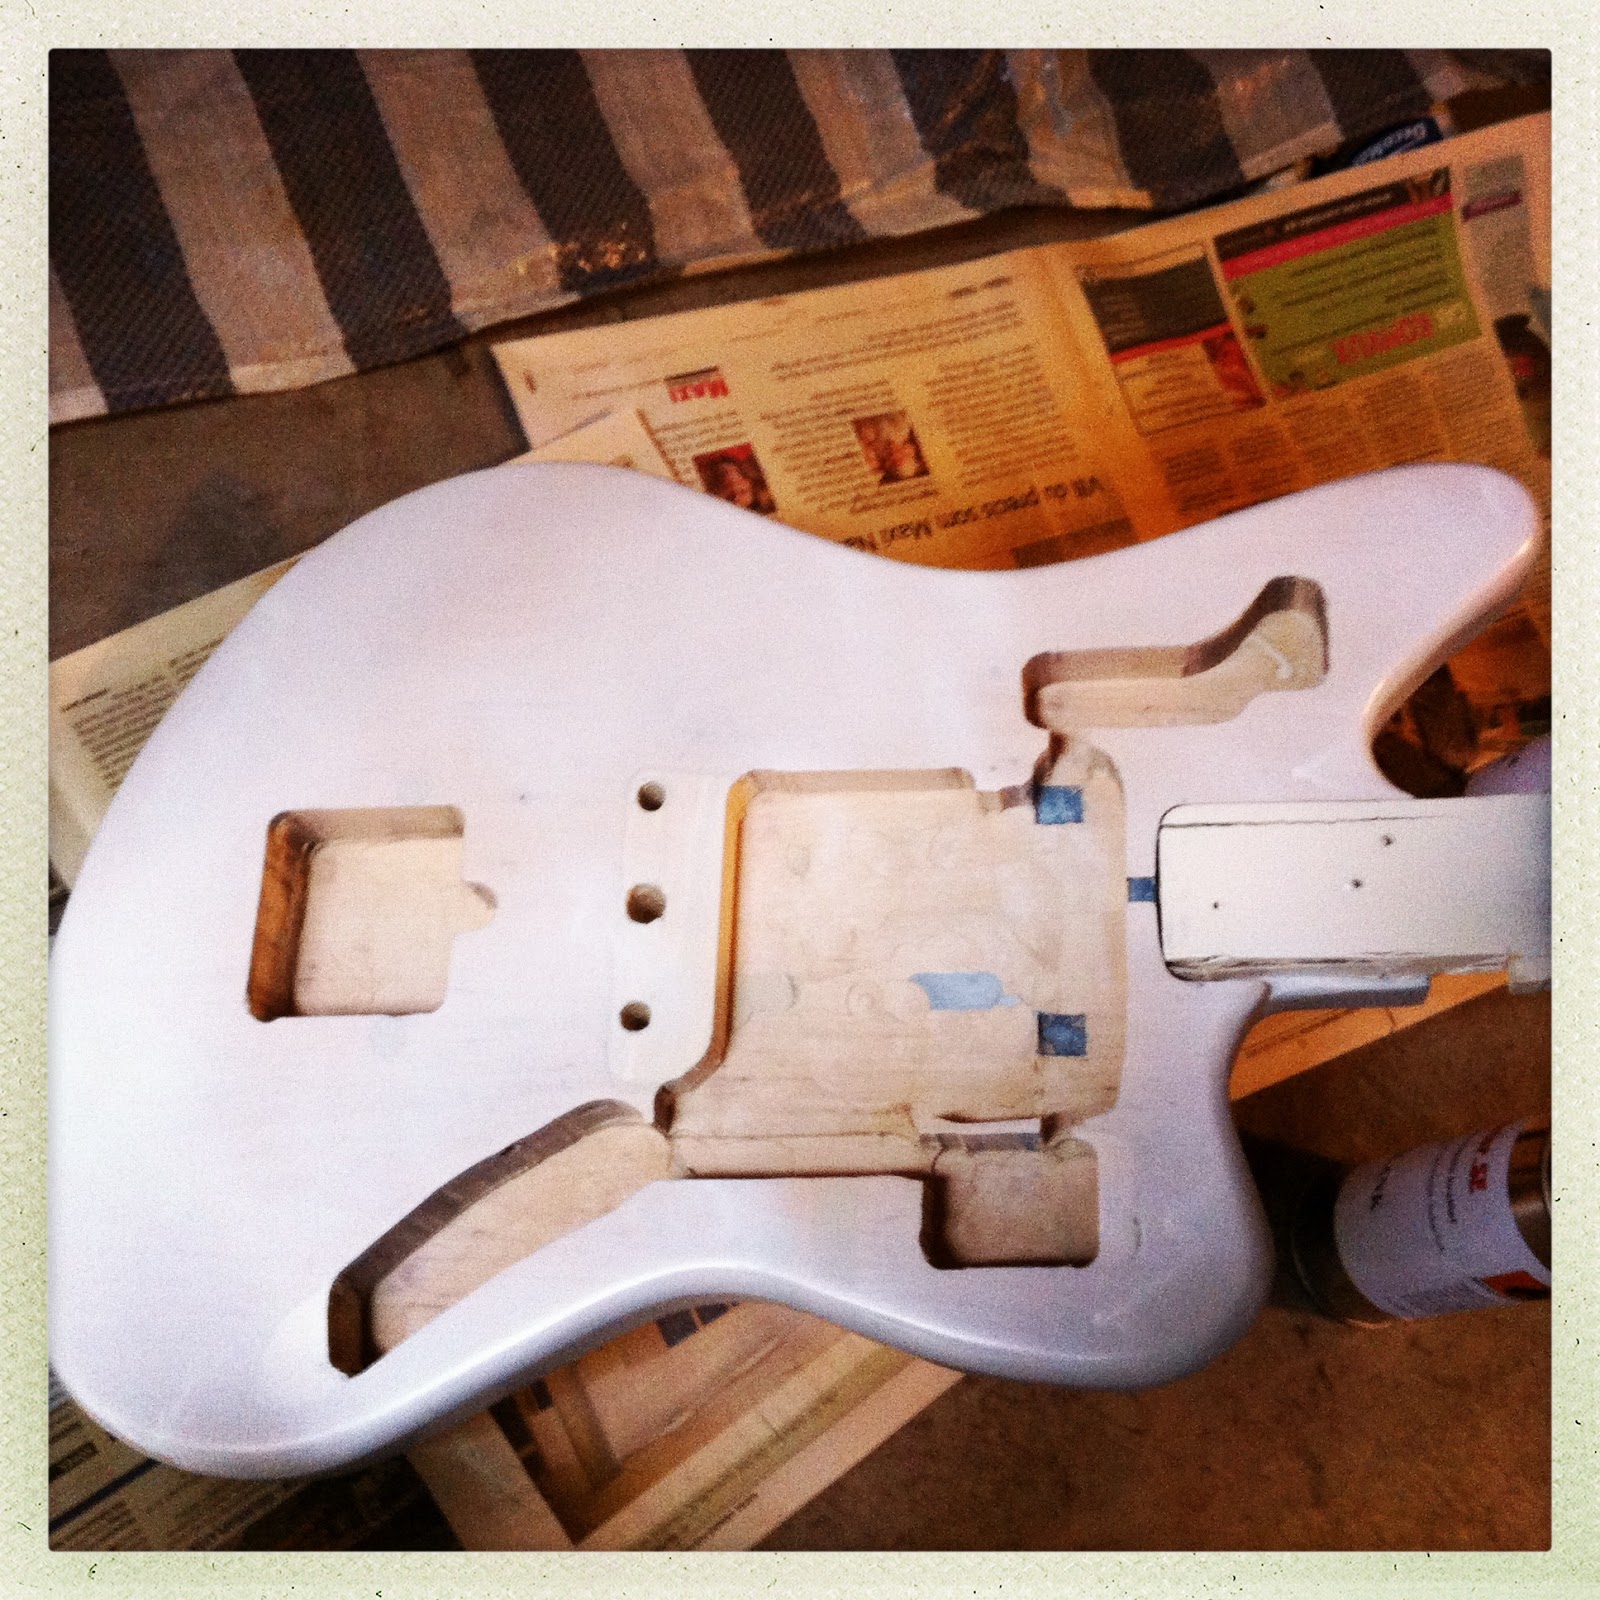
Base coat sealer.

After a couple of weeks of drying I applied a clear coat as a base sealer.
I will still need to fill some small uneven areas with plastic filler.
Fitting the Bridge to the new wood parts.

First base coat

After some sanding, time for more color.

More layers of color and more sanding was done. And some plastic filler over some smaller areas. Don't have pictures of all of this.
I used a Olympic white type of color. But I wanted it to look like an aged Olympic, that somewhat yellowed effect. So I hade to use 3 different layers of cellulose lacer for the finish.
First off a matt base (5 layers), then a semi gloss (3 layers) and lastly a high gloss (1 layer.
I tested it on a separate piece of wood first. To make sure I got it right.
The wet sanding I did after this took away most of the high gloss, making the aged Olympic look more correct.
I have decide not to buff the body at all, leaving some of the wet sand marks, again to make it look more correct. I got some more info from www.guitargarage.blogspot.com that it use to be the case back in the 70s not to buff the bodies completely
And then I got this...


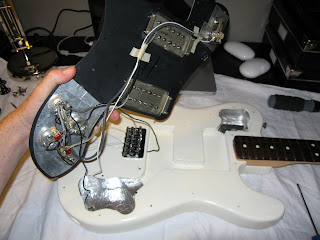
Now it’s time to get all the wiring sorted out and checking that all the parts match up.
My specs are:
- Two Original Fender Deluxe Humbuckers original, approx 1974-75. The both read around 11.
- A complete wire harness with pots, switch (and knobs). All -72 reissue from 2005
- One original Fender Telecaster Deluxe bridge, approx 1977.
- One original Fender neck plate, screws original but the bolt is a replacement non Fender part, date 1979.
- Machine heads, Fender -70 reissue from 2008
- One Fender Stratocaster C-shaped Mahogany neck. -70 reissue from 2008
The plan here is to keep a look out for a Telecaster deluxe neck that will fit the soul of this guitar. Or I might just put on a replacement fender decal that say Fender Telecaster Deluxe, and keep the mahogany. I don’t think anyone will accuse me of fraud on that one!
If anyone has late -70’s Telecaster deluxe part for sale, let me know.
Fender wiring map from 1970:

Fender wiring map from 2000 for the reissue models:

Fender Telecaster Deluxe 1970 and something....
My guess of the correct age of the body is now leaning towards mid 70, let's say 1975!
Well it's all done. What do ya'll thing about it?